Weather stripping is crucial for a comfortable and quiet ride. It seals gaps, preventing leaks, noise, and damage. This guide provides comprehensive Tips For Replacing Car Weather Stripping yourself.
Understanding Car Weather Stripping
Weather stripping, also known as gasket, is the rubber seal around doors, windows, and trunks. It protects your car’s interior from the elements, ensuring a comfortable driving experience. A tight seal keeps out water, air, noise, and even pests. It also helps maintain your car’s internal temperature and prevents mold growth.
When to Replace Your Weather Stripping
Damaged weather stripping can lead to various problems. Look for these signs:
- Visible Damage: Cracks, tears, or missing chunks indicate the need for replacement.
- Leaks: Water entering your car after rain or washing suggests damaged seals.
- Wind Noise: Excessive wind noise at higher speeds points to compromised weather stripping.
- Drafts: Feeling air movement while driving signifies a poor seal.
- Mold or Mildew: A musty smell or visible mold inside your car could be due to leaky seals.
DIY vs. Professional Replacement
Replacing weather stripping is often a DIY project. However, consider professional help if:
- Glued-in Stripping: Removing glued stripping can be challenging and time-consuming.
- Complex Trim Removal: Some stripping requires removing intricate interior trim, which can easily break.
- Vehicle-Specific Parts: Locating specific stripping for your car model might be difficult.
Tools and Materials for the Job
Gather these essential items:
- Flathead screwdriver
- 90-degree picks (for cleaning retainer tracks)
- Sandpaper
- Clean rags and microfiber towels
- Utility knife (optional, for repairs)
- Replacement weather stripping
- Adhesive remover
- Weather strip adhesive (3M Black Weatherstrip Adhesive is recommended)
- Silicone spray and gel (optional)
- Low-adhesion tape or clamps (optional)
- Foam backer rod (optional, for repairs)
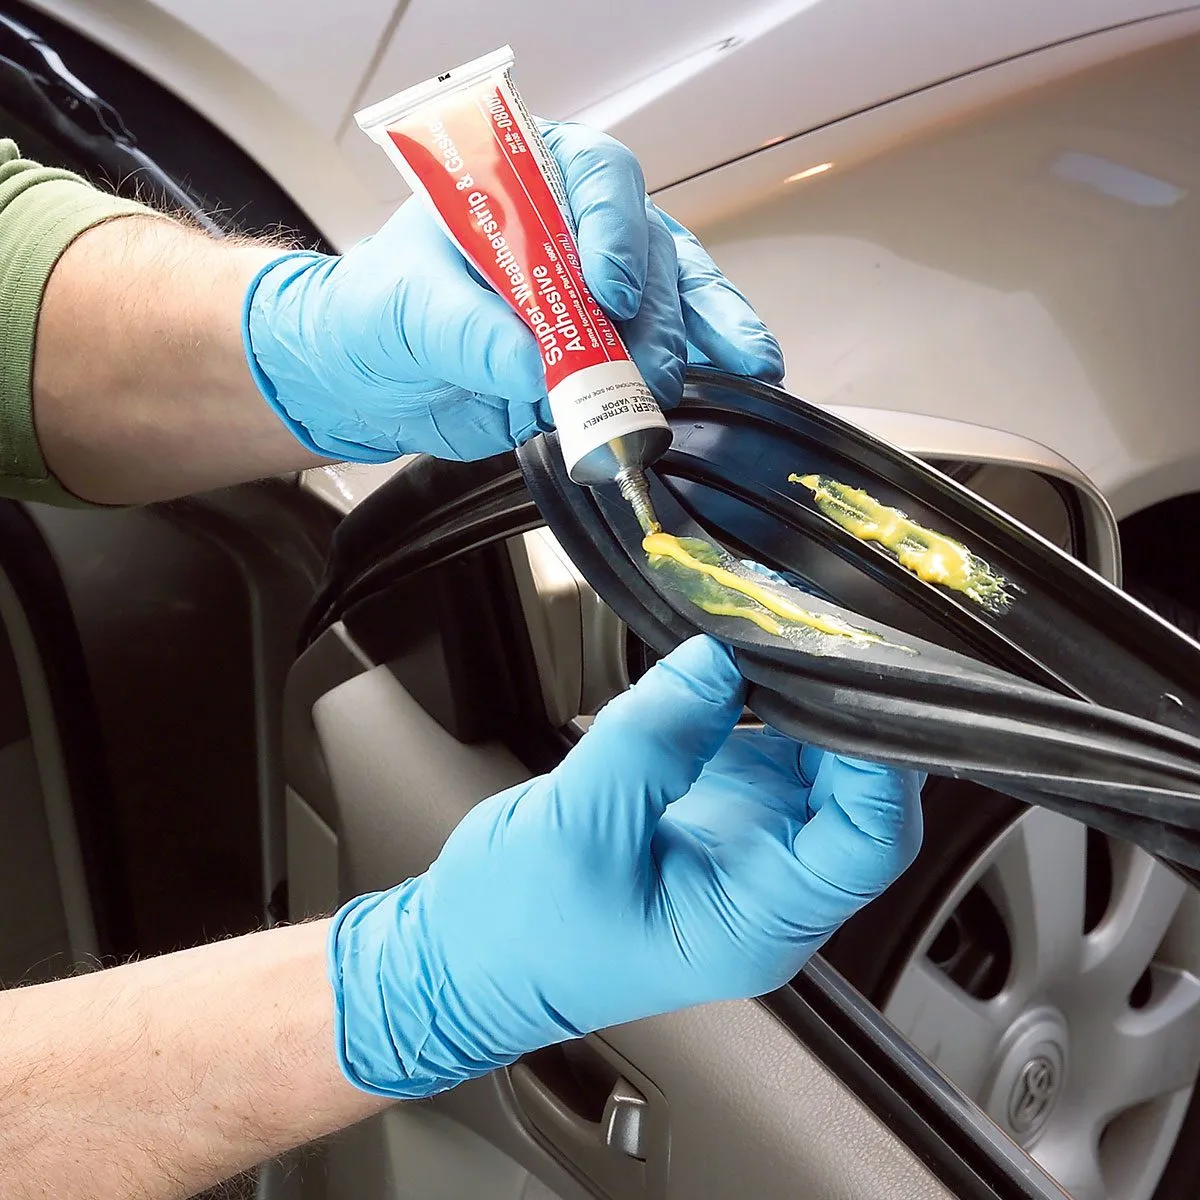 Applying glue on the stripping of the car door
Step-by-Step Replacement Guide
-
Assess the Damage: Determine if repair or replacement is necessary. Small tears can be patched with adhesive.
-
Remove Old Stripping: Carefully peel off the old stripping, avoiding paint damage.
-
Clean the Area: Thoroughly clean the surface with adhesive remover and picks, ensuring it’s dry and debris-free.
-
Apply New Adhesive: Test fit the new stripping. If needed, apply a thin, even layer of adhesive to the car surface, following manufacturer instructions.
-
Install New Stripping: Carefully align and firmly press the new stripping onto the adhesive. Secure with tape or clamps until the adhesive dries completely. Avoid closing the door before the adhesive cures.
-
Test and Clean Up: Check for gaps and proper adhesion. Clean up any excess adhesive.
Maintaining Your Weather Stripping
Regular maintenance prolongs the life of your weather stripping:
- Clean Regularly: Use car wash soap and a soft brush to remove dirt and debris.
- Dry Thoroughly: Use a microfiber towel to dry the stripping completely.
- Apply Protectant: Apply a silicone-based protectant to keep the rubber soft and pliable. Avoid aerosol-based protectants as they can damage the rubber. A silicone paste can also be used sparingly.
Cost of Replacement
Costs vary greatly. Generic rolls can be under $25, while vehicle-specific stripping can reach $800, especially if professional installation is required.
Conclusion
Replacing car weather stripping is a manageable DIY task that can significantly improve your driving experience. By following these tips and performing regular maintenance, you can ensure a comfortable, quiet, and leak-free ride for years to come.