Weather stripping is a crucial component of your car, protecting it and you from the elements. But like any car part, it can wear out over time. This guide provides expert Tips For Replacing Car Weather Seals, ensuring a comfortable and protected driving experience.
Damaged weather stripping can lead to a noisy, leaky, and uncomfortable ride. Common causes of damage include freezing temperatures, UV rays, normal wear and tear, and even dragging your feet when entering or exiting the vehicle. While replacing weather seals is often a DIY project, there are instances where professional help is recommended. These include situations where the seal is glued in, requires tricky interior trim removal, or involves a hard-to-find part specific to your car model.
Understanding Car Weather Stripping
Car weather stripping, also known as gaskets, are rubber seals that fill the gaps between your car’s body and its doors, windows, trunk, hood, and windshield. These seals play a vital role in:
- Preventing leaks: Keeping out rain, snow, and air.
- Maintaining interior comfort: Insulating against extreme temperatures and reducing noise.
- Protecting against damage: Preventing mold, mildew, and rust.
- Preserving resale value: Maintaining a clean and well-maintained appearance.
A simple test to check your weather stripping is to place a dollar bill between the seal and the body. If you feel resistance when pulling it out, the seal is good. If not, it might be time for a replacement.
When to Replace Your Car’s Weather Seals
Several signs indicate it’s time to replace your weather stripping:
- Visible damage: Dry rot, cracks, tears, or missing chunks.
- Leaks: Water entering the cabin during rain or car washes.
- Drafts: Excessive wind noise while driving.
- Loose seals: Stripping that is easily pulled away or detached.
- Mold or mildew: Growth inside the car due to moisture intrusion.
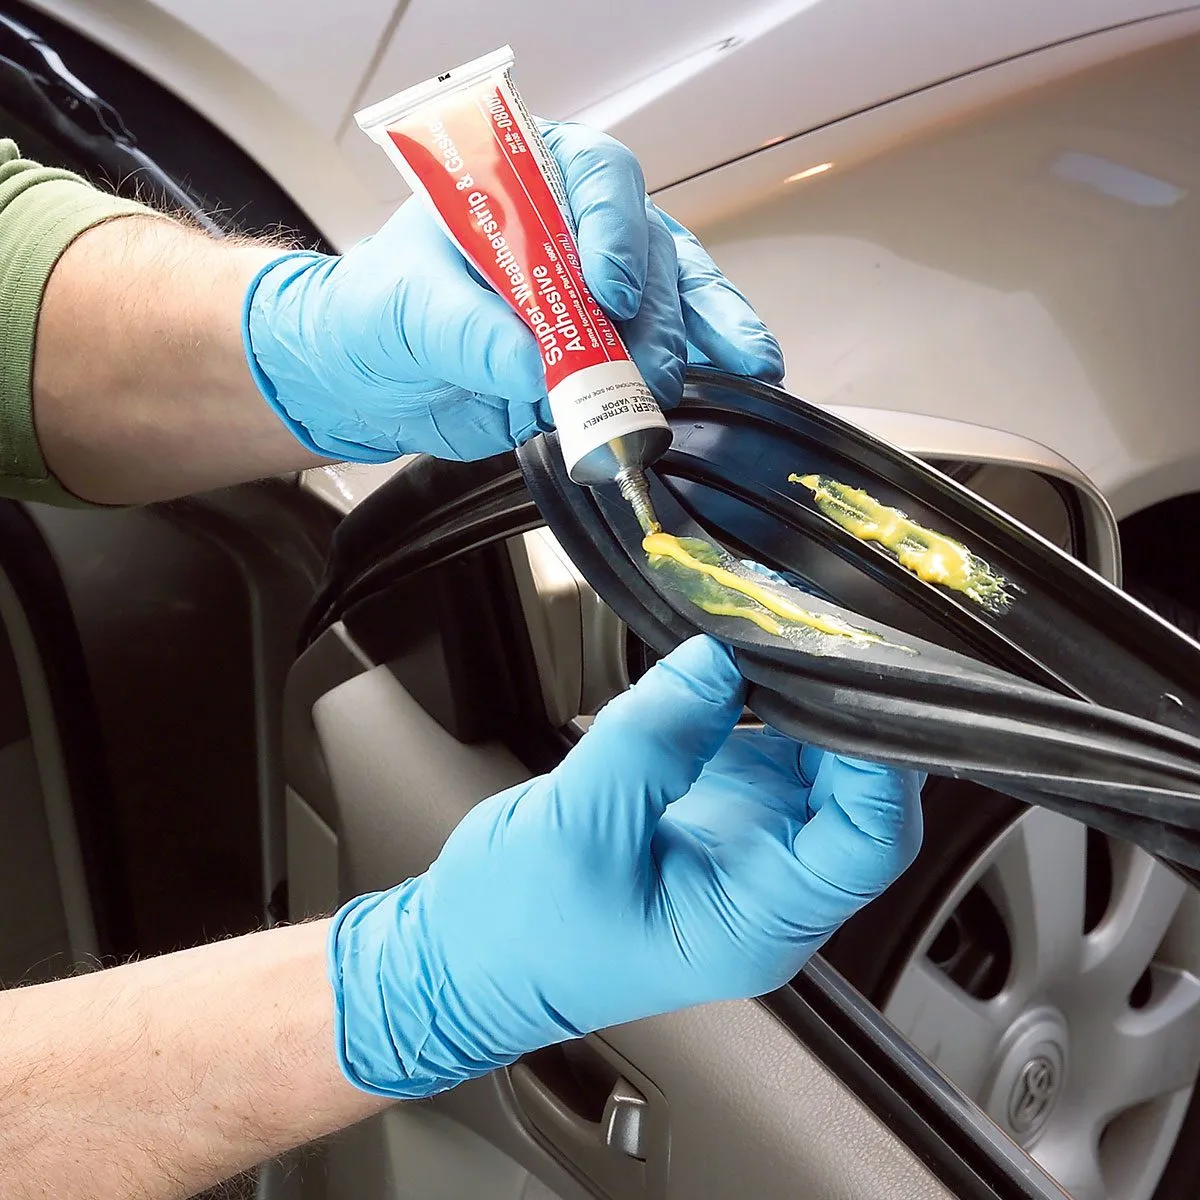 Applying glue on the stripping of the car door
DIY Weather Seal Replacement: A Step-by-Step Guide
Replacing weather stripping can often be done at home with a few tools and materials:
Tools:
- Flathead screwdriver
- 90-degree picks
- Sandpaper
- Clean rags
- Microfiber towels
- Utility knife (optional)
Materials:
- Replacement weather stripping
- Adhesive remover
- Weather strip adhesive
- Silicone spray
- Silicone gel (optional)
- Low adhesion tape or clamps (optional)
- Foam backer rod (optional)
Steps:
-
Assess the damage: Determine if repair or replacement is necessary. Minor damage can be patched with weather strip adhesive.
-
Remove the old seal: Carefully peel off the old stripping, avoiding damage to the paint.
-
Clean the surface: Remove any remaining adhesive and debris using adhesive remover, rags, and picks. Ensure the surface is completely clean and dry.
-
Apply new adhesive (if necessary): Some replacement seals come pre-coated with adhesive. If not, apply a thin, even layer to the surface where the new seal will be attached. Follow the adhesive manufacturer’s instructions.
-
Install the new seal: Carefully align and press the new weather stripping into place. Use tape or clamps to hold it while the adhesive dries. Avoid closing the door or trunk until the adhesive is fully cured. Experts recommend 3M Black Weatherstrip Adhesive.
-
Test and clean up: Once dry, test the seal by opening and closing the door or trunk. Check for gaps and remove any excess adhesive.
Maintaining Your Car’s Weather Seals
Proper maintenance can extend the life of your weather seals:
-
Regular cleaning: Wash the seals with car wash soap and a soft brush, paying attention to areas where dirt accumulates. Dry thoroughly with a microfiber towel.
-
Apply protectant: Use a silicone-based protectant or paste to keep the rubber soft and pliable. Apply sparingly, avoiding aerosol-based products that may damage the rubber. This is especially important in areas with extreme temperatures.
Cost of Weather Seal Replacement
The cost of replacing weather stripping varies greatly. Generic rolls of self-stick or friction stripping can be purchased for under $25. However, vehicle-specific seals or those requiring professional installation can cost significantly more, potentially up to $800.
Conclusion
Replacing car weather seals is a crucial maintenance task that can significantly impact your driving experience and the longevity of your vehicle. By following these tips and performing regular maintenance, you can keep your car protected from the elements and enjoy a comfortable ride for years to come.