Your cart is currently empty!

Indoor Orchid Care Tips: A Comprehensive Guide
Indoor orchid care can seem daunting, but with the right knowledge and a little patience, you can enjoy these exotic beauties in your home. This guide provides comprehensive Indoor Orchid Care Tips, covering everything from watering and lighting to repotting and pest control.
Understanding Your Orchid’s Needs
Orchids are not as delicate as their reputation suggests. They simply require specific conditions that mimic their natural habitat. The key to successful indoor orchid care is understanding these needs and adapting your approach accordingly. Different orchid varieties have slightly different requirements, so researching your specific type is always helpful. General indoor orchid care tips apply to most common varieties, such as Phalaenopsis (Moth Orchids), Cattleya, and Dendrobium.
Light: The Key to Healthy Growth
Orchids thrive in bright, indirect light. Avoid direct sunlight, which can scorch their leaves. An east-facing window is often ideal, providing gentle morning sun. If your orchid isn’t receiving enough light, its leaves may become dark green. Conversely, too much light can result in yellowing leaves.
One helpful tip for gauging light levels is the “shadow test”. Place your hand a few inches above the orchid’s leaves. A slightly blurry shadow indicates ideal light intensity. A sharp shadow means the light is too intense, while no shadow suggests insufficient light.
 Orchid Light Requirements: Ideal Lighting Conditions for Indoor Orchids
Watering: Finding the Right Balance
Overwatering is a common mistake in indoor orchid care. Orchids prefer to dry out slightly between waterings. Instead of following a strict schedule, feel the potting mix. Water when the mix is almost dry, but not completely. Water thoroughly, allowing excess water to drain completely. Avoid letting the orchid sit in standing water, as this can lead to root rot.
Repotting and Fertilizing: Essential for Long-Term Health
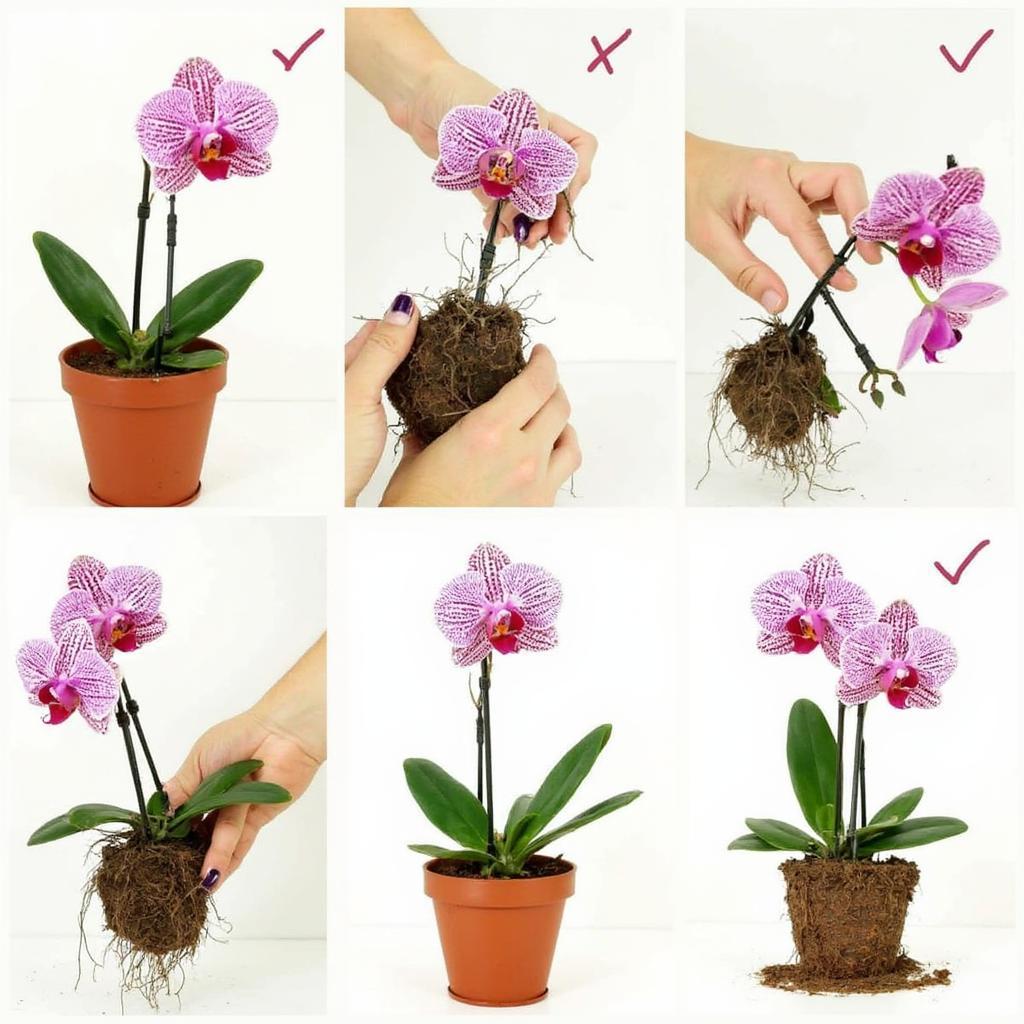
Repotting is crucial for providing fresh nutrients and promoting healthy root growth. Repot your orchid every one to two years, or when the potting mix becomes compacted or decomposes. Use a specialized orchid potting mix, which is typically made of bark chips, sphagnum moss, and other airy materials.
Choosing the Right Fertilizer
Fertilizing your orchid during the growing season (spring and summer) will encourage blooming. Use a balanced orchid fertilizer diluted to half strength. Avoid over-fertilizing, as this can damage the roots.
 Orchid Repotting: Step-by-Step Guide to Repotting Your Orchid
Common Orchid Pests and Diseases
While orchids are relatively resistant to pests and diseases, they can occasionally be affected by mealybugs, scale, or fungal infections. Regular inspection and prompt treatment are essential for preventing serious problems. You can find more information about orchid plant care tips on our website. For tips on other indoor plants, check out our guide on orchid care tips indoor plants.
Conclusion
With these indoor orchid care tips, you can create the ideal environment for your orchids to thrive and reward you with their exquisite blooms. Remember to observe your plants closely, adapt your care as needed, and enjoy the journey of orchid cultivation. For a comprehensive guide on indoor orchid care, see our article on indoor orchids care tips. Don’t forget to explore our tips on rhipsalis care tips and ice plant succulent care tips.
FAQ
- How often should I water my orchid?
- What kind of light do orchids need?
- When should I repot my orchid?
- What type of fertilizer should I use for my orchid?
- How can I tell if my orchid is getting too much or too little light?
- What are the signs of overwatering in orchids?
- How can I prevent pests and diseases in my orchids?
Need more assistance? Contact us via WhatsApp: +1(641)206-8880, Email: [email protected] or visit us at 456 Pine Avenue, Toronto, ON M5V 2J4, Canada. Our customer service team is available 24/7.

Leave a Reply